Tuesday, June 17, 2014

{Binding: A Tutorial}

Bindin A Tutorial

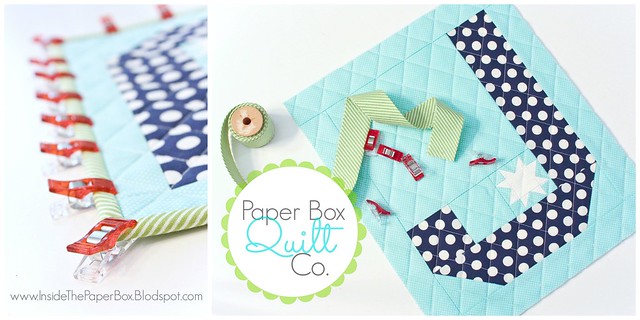
Hi there friends!  I have had some requests for a binding tutorial after posting some images on Instagram and I have partnered with Moda to bring you a full tutorial (with LOADS of pictures) on how to make and sew binding for your quilts and other projects.  

When I started quilting I searched for tutorials online about all the different steps of quilting and used a collaboration of many methods to figure out what worked for me.  That was about 5-6 years ago, and recently, I was thinking "why post a tutorial on binding?  Everyone knows how to bind!"  FALSE.  It was like I forgot I was once looking, myself, for tutorials on the basics of quilting.  So, I hope, if you are just learning, re-learning, or looking for a new method, that you hop on over to the Moda Cutting Table and check out my tutorial!  Happy Binding!

PicMonkey Collage

Friday, March 28, 2014

{Fabric Stash Friday: Spring Citrus}

Fabric Friday 3/28 Collage
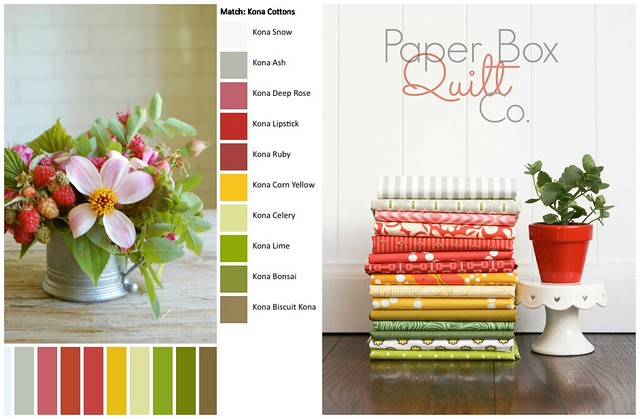
Flower image by Chelsea Fuss of Frolic.

Today's Fabric Stash Friday is Ale's pick.  It's really "springy".  Appropriate with the warmer weather we've been having lately, wouldn't you say?  This palette is like a bowl of apples, oranges, lemons, limes, kiwi!!  It made me dig deep into my green stash and find something other than bright, bright lime green or chartreuse.  I tend to love the brighter greens and don't stash too many natural/more subdued greens.  That being said, I LOVE this fabric stack.  It is so refreshing.  I need more greens!!

Fabric Friday 3/28

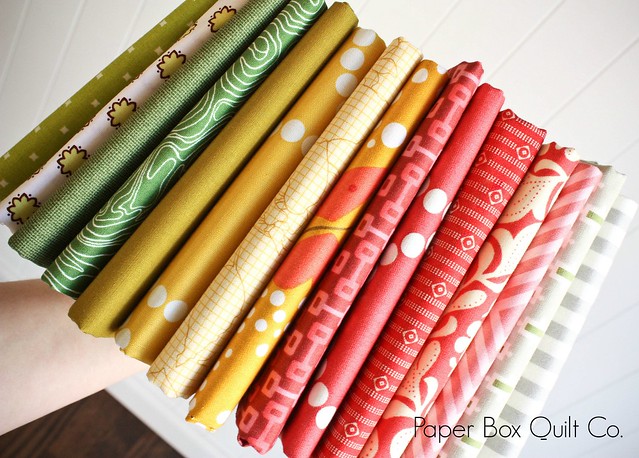
This collection has several prints by Lizzy House, a couple Carolyn Friedlander prints and some fabulous older Sandi Henderson prints.  How would your Fabric Stash Friday look today?  Do you need more gold tone fabrics in your stash?  Want to play along?  Check out the Fabric Stash Friday flickr group!  We want to see what you have in your stash too!  What would you make with these fabrics?  I'm thinking a new table topper for my coffee table.

Fabric Friday 3/28

Friday, March 14, 2014

{Fabric Stash Friday}


Fabric Friday 3:14 

 I'm pretty sure I found this image on Pinterest and I am seriously swooning over this color palette.  It's not as bright as I usually go, but I am really feeling the muted tones.  It's calming, right?  And really, you can't usually go wrong with gold in your stash.  (especially if it's sparkly) ;)

Fabric Friday 3:14 

 If you don't know by now, aqua/mint is my very favorite color.  I want to paint every wall in my house aqua.  And sew everything in aqua.  It may not surprise you that I had about triple the amount of mint/aqua fabrics pulled for today's Fabric Stash Friday and had to put some back.  It was hard.

More Pearl Bracelets in this stash today (a FAB mixer).  Along with a few solids, mirror ball dots and some metallics for that perfect sparkle.  It looks like there are a few prints in there from V&Co. too.  (LOVE her new line)  Wouldn't this make a gorgeous quilt?  Who wants to come make one with me?  What's your favorite color palette right now?  What colors are you just totally inspired by?
Fabric Friday 3:14

Friday, March 7, 2014

{Goldwillow Afghan}


Goldwillow Afghan

I have this friend.  Her name is Ale.  She's extremely talented.  We chat all the time about practically anything.  You can read about her art on her Golden Willow Quilts blog.  Anyway, we did a pretty special swap recently and I made her this cozy afghan.  Fun right???  WELL, it was getting so much attention on my Instagram feed (@InsideThePaperBox) that I've had some requests for more swapping!  If you head over to my IG you can follow along as I make them.

This crochet pattern is called the Sunburst Granny Square and you can find the tutorial I used HERE.  If you're a little knowledgeable in crochet, it should be a breeze.  If you're just starting out, YouTube is a GREAT tool for learning new stitches.  I utilize it ALL the time.  I've had a LOT of inquiries about the type of yarn I used on this one.  It's a bit of a mix, so hard to list it all, but what I can tell you is the majority of the colors for the circles were Berroco, Vintage.  I used mostly worsted weight acrylic/wool blends with a couple 100% wool and a couple aran weights mixed in.  The grey joining yarn I used is Vanna's Choice, Lions Brand 100% acrylic in Linen.  I made this one 10x14 squares making the final measurement ABOUT 45x60".

I'm currently hosting a casual little Crochet-A-Long on Instagram for the Sunburst Granny Afghan (#SunburstAfgahnCAL)  Go check it out and I hope you get inspired to try it out yourself and share your progress.

Goldwillow Afghan

I'm also working on another afghan (because I have like, project ADD or something) using this circle pattern.  It's much quicker and uses less yarn than the Sunburst Granny Square, a great pattern if you're hesitant to try the sunburst.  I'll keep you posted about how that one is coming along in the next few weeks.

Goldwillow Afghan


Goldwillow Afghan

But this GoldWillow afghan has gone to live at it's new home in Portland.  I'm extremely happy she is so in love with how it turned out.  Crafty friends are the best!

xoxo

Goldwillow Afghan

Friday, February 28, 2014

{Fabric Stash Friday}


February Fabric Stash Friday 

Okay friends, do you want to push yourself to use that funky print you've had forever and are just too scared to use?  OR do you want to work on that color specific custom order and LOVE it?  OR do you just want to play with pretty fabric for a while and challenge yourself to put together new color combinations that might be a little out of your comfort zone?  FABRIC STASH FRIDAY!  I've teamed up with Ale from Golden Willow Quilts and we have chosen some really fabulous color palettes to inspire new fabric combinations right from your very own stash!!  You don't even have to go to the fabric store to play!  The goal here is to maybe pick one of your favorite colors and combine it with something new and fresh.

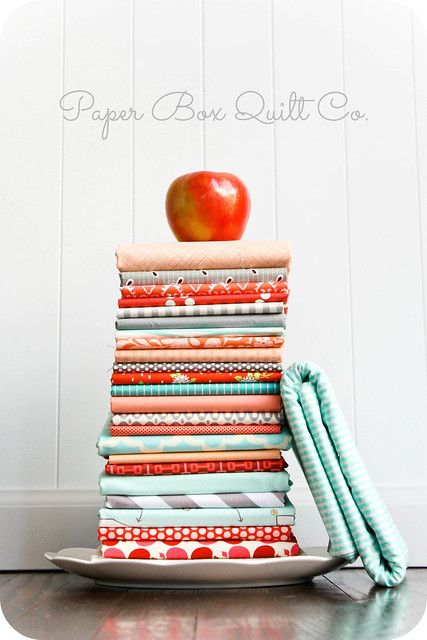
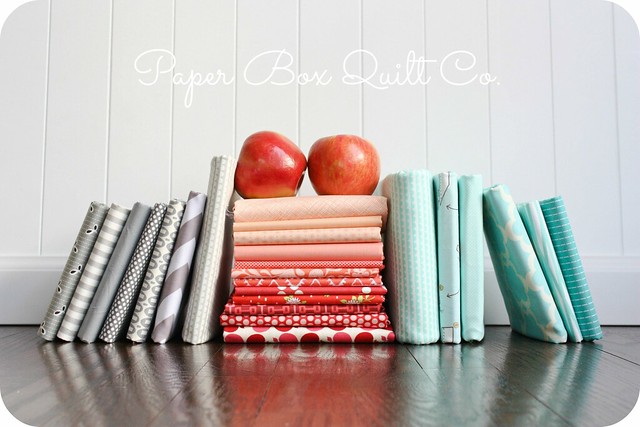
This week Ale picked this sweet image that is actually a complete contradiction to my previous statement because it is so so me, right up my alley.  I LOVE AQUA!  And then pair it with some reds and PEACH?!?!  Y.U.M.  (I MAY have chosen a few more prints than necessary)  I super love pretty much all Bonnie & Camille fabrics and it shows in this weeks stash.  Several prints from a couple of their earlier fabric lines (Ruby, Bliss,.... Sundae stripe is a FAV print of mine and happens to be making a return in their new line, Miss Kate).  I threw in some basics like chevron, stripes, dots and solids.  Then some more unique staples like Pezzy, Pearl Bracelets and Crosshatch.  And how cute are those apples and the Henna Garden by Sandi Henderson??  This is a perfect color combination in my opinion and was super easy for me to pull together.

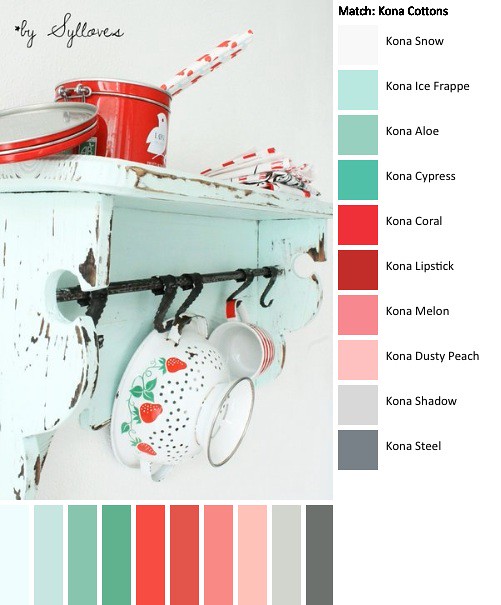
The palette below was created using the Palette Builder at PlayCrafts and it pulls Kona solids for you to use to create your perfect fabric combination (!!!!) Awesome right???  Kona Ice Frappe???  Perfect.  Head on over to see what Ale has created for her Fabric Stash Friday using the same inspiration.  (You won't be sorry, her fabric collection is amazing)


Fabric Friday 2:28 

Stay tuned in a couple weeks for the next Fabric Stash Friday color challenge.  It's a fun one!  Want to join in? Contact me.  If there's enough interest, we'll share the inspiration images and do a little link up!

Happy Weekend Friends!
xoxo


February Fabric Stack Friday

Monday, September 30, 2013

{Sewing Summit, 2013}

logo

Wow!  What an experience you guys!  I've basically been looking forward to SS13 since I saw (on IG) how much fun everyone was having last year and got completely jealous.  But seriously, totally awesome.  My friend, Ale and I got our tickets the minute they went on sale and basically acted like 12 year old girls about the whole thing.  Talking about being roomies, planning pre Sewing Summit projects, discussing how over packed we would be and how big of an extra (empty) bag to bring to carry home our goodies.

Photo dump coming up.  My apologies for the picture quality.  All pictures are camera phone only.  I'm not even sure I know WHY I brought my Canon with me. ;)
DFW--->SLC

Here I am.  DFW ------> SLC bound.  Obligatory foot/handmade bag/airport pic.  (in the aqua skinnies I HAD to purchase the evening before leaving) ;)

SS Shops

Obviously, the first thing you do when you arrive in Salt Lake City to attend Sewing Summit, is go fabric shopping.  Here we were at Material Girls Quilts and Pine Needles.

Shopping

And BUY ALL THE FABRIC.  Why yes, I did buy the end of the bolt of several Bonnie & Camille prints.

FPP sewing summit

The class line up was so great this year.  I had several wonderful and insightful lectures and hands on sewing classes.  Here I am with Christina from The Sometimes Crafter in her Foundation Paper Piecing class.  I loved finally getting to meet her in person and her class was great.  LOOK at that little block I made!

SS Personal Branding

I took the Personal Branding lecture with Olivia Omega and guys, she was AWESOME!  So much fun!  She insisted that we take a selfie.  In class.  And post it RIGHT THEN.  So here I am with Kaylee, who actually happens to be a local friend that I met through Instagram and our love of sewing.  But definitely go check out Olivia's Website and Blog.  She has so many wonderful things to share about being yourself and being authentic on your blog.

SS Heather Bailey

Heather Bailey was the keynote speaker.  HEATHER BAILEY!  Her story was wonderful.  She talked about how she got started designing fabric for Freespirit and touched on all the other super amazing things she's done.  She was beautiful, inspiring, wonderful and sweet and she was genuinely happy to be with us during Sewing Summit.

I didn't get pictures of EVERY class, but I really did take some great ones.  Publishing a craft book.  Photography.  HTML for bloggers.  LEGGINGS!  I MADE LEGGINGS!  And they FIT!  I'm pretty pumped about that.

PicMonkey Collage

But what I FORGOT to mention, because I'm such a terrible blogger, is that I TAUGHT MY OWN CLASS!!!  I taught a group of 30 people how to make mini dresden plates!  They did so well!  Which is awesome because I was pretty nervous about it.  I have a pretty roundabout way of doing things sometimes that I always think only make sense to me.  But they made some super adorable tiny dresdens.  I got wonderful feedback and felt pretty special to be among so many other talented teachers and speakers.

teaching dresdens SS

So that's about it in a very small, short nutshell.  I'd have to say, one of the coolest parts (and maybe a little scary) is meeting all these people you have become real friends with, that share the same interests and have never actually met face to face.  A really cool feeling.  Thank you to Erin and her crew for putting it together.  Nice work.

xoxo

Sunday, August 11, 2013

{New Paper Box Quilt Co. Items Up For Sale}

Well, the Paper Box Quilt Co. staff (me and sometimes my mom) has been busy busy sewing and creating the last couple months.  People are having babies and parties and PBQC is right there to help celebrate!  I just listed some new items in my shop today so head over and check it out!

Fabric Garlands

LOTS of garland!  These are SO fun and festive.  Perfect for parties, picnics, weddings, nurseries and photo shoots!  What would/do you use yours for?

This weekend my sister-in-law and I attempted a one year photo shoot of my niece, Ellie, and while we DID get some pictures, she was NOT a fan of this set up.  I however, loved it and took the opportunity to get some shop pictures while it was out.

Fabric Garlands
Mini Quilt Collage
and a couple new MINI quilts, Summer Citrus and Ellie.

All of the garlands are available by the food in pretty much any length you can imagine, so please feel free to contact me if you need a longer length then I have listed.

Anyway, I hope your summer is going fabulously!  We, at the Lathroum house, are ready for FALL! :)

OH and don't forget to visit me on Instagram, InsideThePaperBox.  You can follow along as I make all the fun new PBQC items!

xoxo

Friday, May 31, 2013

{Bloglovin}

<a href="http://www.bloglovin.com/blog/3566927/?claim=2n5hf6vcwap">Follow my blog with Bloglovin</a>

Lets see what it's about! ;)

Tuesday, May 7, 2013

{Win a Paper Box Quilt Co. baby quilt at Lay Baby Lay!}

Lay Baby Lay Giveaway

If you are following my Instagram stream, then you have probably seen this quilt.  Well, today is your lucky day, because Joni is GIVING IT AWAY on her blog LayBabyLay.  I have been a fan of her blog since she started it.  She always has such fabulous design boards for decorating your little ones rooms.  If you haven't been reading it, please do head over and check out her ideas.  Just beautiful.  She has taken this quilt and designed a whole inspiration board around it for you, and she has paired this quilt with such awesome stuff, that I want to win it!!  So go.  Hurry.  Tell her hi and enter for your chance to win a Paper Box Quilt Co. quilt for your home.

triangles-inspiration-board-600x1319

Thanks Joni!

Thursday, April 18, 2013

{Sewing Summit, 2013}


SS13button

Tickets went on sale this week!  Who's going?!?!  I sure am.  I MAY have been stalking the registration page on the Sewing Summit website all morning and my ticket MAY have been purchased at about 11:02am (they went on sale at 11am)  But I'm totally cool about it.  Not overly excited.  (Eeeeeeek!)   I can't wait to meet and sew with so many people in this online sewing community that I've never met in person.  Also, this will be my first time leaving my little boy overnight/for longer than just the day.  Right now, I'm good with it.  I might be a nervous wreck when it's time to leave.

Who else is going??

Tuesday, April 2, 2013

{I'm Back! And with a How-To}

Oh hi!  So, I may have forgotten how to blog and this post might have taken me about a week to write. No really.  (correction: original post took me a week, then it vanished into thin air so I'm on week 2, writing this post again.  See.  Forgot how to blog) ;)

Triangle Design Wall

Things are always busy.  That's just the way it is.  I let my blog get away from me, BUT the good news is that I've done a lot of cool stuff lately, so I'll have plenty to share soon.  First up is a little how-to for sewing together triangles.  I've seen some really cute triangle quilts lately so I decided I needed to make one myself.  I was so annoyed at how much trouble I was having sewing these together.  I mean, I was sewing triangles, not parallelograms or trapezoids.  Triangles.  So I asked my stitchy friends on Instagram for a little help and I'm going to share what I discovered worked best for me.  There's really no trick or shortcut to it, just patience.

Triangle header

First things, first, I used the ruler below to cut my triangles.  You get 4.5" equilateral triangles.  I tried using the 60 degree lines on my straight cutting ruler, but this worked better for me and I found it at my local quilt shop.  The directions say to cut 4.5" x WOF strips, then line up your fabric strips on the triangle portion of the ruler.  You can cut 5 triangles at a time, more if you layer your fabric.  If you're using this ruler, you'll get triangles with 2 sharp points and one flat point.  That will be important when you're matching up your pieces.  Once you have all of your triangles cut, lay them out just how you want to sew them together.  For mine, I just went with a random layout.

Ruler

Stack up your first row IN ORDER that you will be sewing it.  I actually laid them out again right next to my machine just so there would be no placement issues while I was sewing.

PBQC
triangles

Let's sew the first two triangles together.  Stack them right sides together making sure to match your sharp points and flat points like below and sew them together using a 1/4" seam.

PicMonkey Collage

"Tip" #1: Press your seams OPEN AS YOU GO trying not to stretch those bias edges.  You want to sew, press, sew, press, sew, press and so on.  I'm a big fan of chain piecing then pressing like a million pieces at once (or recruiting my mom to press a million pieces for me) ;)  "Tip" #2: Don't try to chain piece these.  I started off chain piecing and it just didn't work.  I also almost always press seams to the side, but for this, definitely press open!  If you're a strict to-the-side presser, try doing these open, you'll find that you will get much nicer points and your pieces will be easier to match up.  So, press seams open, don't chain piece.

PicMonkey Collage2


Move on to your next triangle, sewing and pressing the same as the first set, making sure to line up your flat and sharp points and pressing your seams open again.  Continue sewing all your triangles into rows.


PicMonkey Collage3

"Tip" #3: Trim your points.  Once I had all my rows sewn together, I went through and trimmed the little points off from the "intersections".  I thought it would help reduce bulk right where I wanted my fabric to lay flat and my points to be pointy.  You can see three little points in the seam below, just chop those off. (but be careful not to chop into the seams of course)

IMG_6886

PicMonkey Collage4

To sew your rows you just want to line up your seams/points really well.  Here's "tip" #4: pin. pin. pin. I am so guilty of never pinning.  Ever.  Don't skip it here!  These triangles really got me out of my comfort zone and had me pinning like crazy.  Line up each point and put a pin right in your seams.  For some of my points I was a bit OCD and spent a little extra time matching the points.  If you take your pin and stick it through the tip of the point on the top and bottom layers, wiggle it together a little then pin it flat you'll have those points matching even if you didn't get a perfect 1/4" seam allowance at every point.  (that's a lot of pinning points right?  Let me know if it doesn't make any sense).  Press seams open.

PicMonkey Collage5

You can see above how sharp the points turned out and how nicely they matched up.  Like I said, there's really no trick to this (as I discovered the hard way).  You just have to be patient and don't try to find a shortcut.  I took a picture of my sewing area so you could see that I pushed my ironing board as close to my machine as I could get it since I had to press after every piece.   I'm so used to "batch" quilting that this was really strange.  Aaaaand I might be a little bit lazy.

Sewing Room

So, if you ever wanted to try piecing triangles, go for it!  Be sure to post pictures or share them on Instagram and let me know how these tips worked for you!  See you soon. (hopefully)

XOXO

Wednesday, January 30, 2013

{Heart Oven Mitt Tutorial by Dresden}

Today I bring you a sweet Valentiney tutorial from guest blogger Dresden, of www.dresdencarrie.com Enjoy!


This heart oven mitt is so cute! The little half hearts are perfect to slip your hands in and grab anything hot. This would make an adorable Valentine's gift with a bag of chocolate chips or any baking supply.


Materials needed:

-2 fat quarters (or scraps, the heart isn't too large)
-heart pattern (found here)
-batting, Insul-Bright is best and can be found at any sewing store
-trim (if desired, pom pom trim is adorable on these!)
-sewing supplies


Steps:

1. Cut:

    2 large hearts on the fold of fabric
    1 large heart on the fold of batting (I used Insul-Bright because it's heat resistant) 
    2 small heart halves
    3 strips of fabric or bias tape pieces about 10 inches long

2. Attach bias tape & trim to straight edge of the heart halves

3. If using a strip of fabric make a loop for hanging by folding fabric in half twice and stitching along edge length wise

4. Make a sandwich in this order:

    batting
    front large heart face up (green heart in picture)
    half hearts placed like they are shown in the finished mitt face up
    loop for hanging (fold in half and pin near top of heart)
    back large heart face down

5. Sew around edge and leave a gap open for turning

6. Turn right side out through gap

7. Hand stitch closed


Happy Valentine's Day!! Be sure to check out my blog! www.dresdencarrie.com

Thanks for having me Jessie!


Thanks so much Carrie!

If anyone else is interested in doing a guest post on my little blog, please let me know. It's been pretty busy over here preparing to move, so I'd love to have you! (If anyone wants to do a post on meal planning/healthy(easy) eating I need an intervention so please email me!) ;).

xoxo

Thursday, January 3, 2013

{Happy New Year}

Wow! Over a month this time?! Well, the holidays kind of turn my brain to mush and lots of things get forgotten. We have been doing lots of cool things over here though! First up, we closed on a house just a couple days before Christmas. It's a dream home! I couldn't be more excited to move in. We have selected some of the paint colors and have already started painting all the inside walls, so we will be moving in slowly, making sure everything is ready and perfect before we have to be out of our apartment in March.

Christmas was wonderful! (And exhausting) we just got back yesterday from a trip to Maryland to visit my husbands family. It was quite a whirlwind. It's still a bit of a blur.

And of course, up until the VERY last minute, I was finishing gifts and projects, packing, painting, moving, mothering, cleaning (not really), baking, wrapping, shipping, shopping, decorating. You know, typical holiday stuff. Now it's time to take it all down, be thankful that Christmas doubles as a deadline so you feel like you got a few things marked off your to-do list, and get back to the normal life pace, whatever that is for you.

I'm going to get working on a couple things that maybe should have hit that Christmas/deadline, do some painting in the new house this weekend, pack a few boxes as I go, get working on a new private swap and also on a pretty awesome giveaway opportunity (more on that one later).

OH and my New Year resolution is to ORGANIZE! There should be a place for everything in the new house and I'm planning to make it so organized you'll hate me when I'm done. I'm talking labels, containers, shelves, closet systems, folders, stickers, racks,.... A. Place. For. Everything. Hold me to it, would ya? What's your resolution?

xoxo

Ps. Is it possible to move your images when blogging from an iPad?? Anyone have tips on that? :-D