First, thanks to everyone that entered my little giveaway! I am hoping to get a few sets of coasters made up for the shop, so stay tuned if you were wanting to get one but didn't win.
Second, I have received some fabulous
Instagram feedback on an ornament that I made recently and several requests for a tutorial. So,... without further ado, my very first TUTORIAL! I would like to start of by saying that I did, in fact, find the idea for this fabric star ornament on
Pinterest. However, when I clicked through to find the tutorial it was in another language. I relied on the pictures to put the star together, but it was a bit of a challenge. SO, I'm putting together something for all my English speaking friends to try out too.
(here is the original tutorial)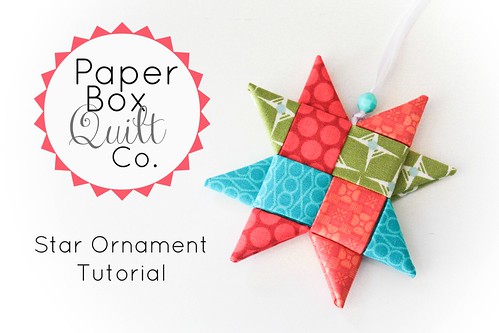 You will need:
- (4) strips of fabric, measuring 3.5" x 12"
- Fabric Glue
- A large eye tapestry needle
-12"-15" of 1/8' ribbon
- Beads (optional)
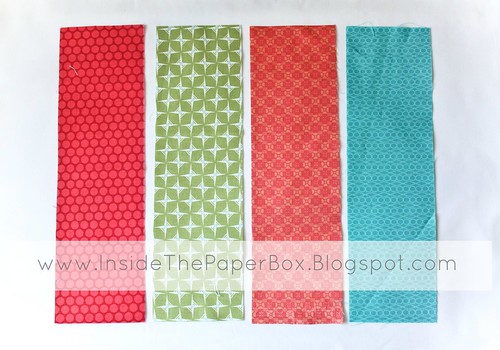 Start with choosing your four prints. Cut them to measure 3.5"x12".
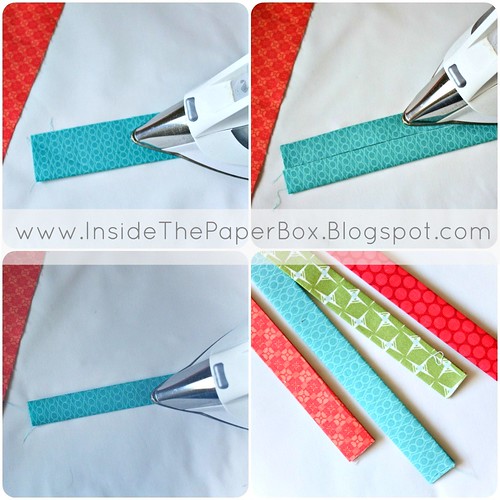
Iron all your pieces in half to crease. Then iron each side into the center to meet at your crease. Fold in half and iron again to get a nice, smooth strip measuring approximately 7/8"x12". (this is essentially a double fold binding strip)
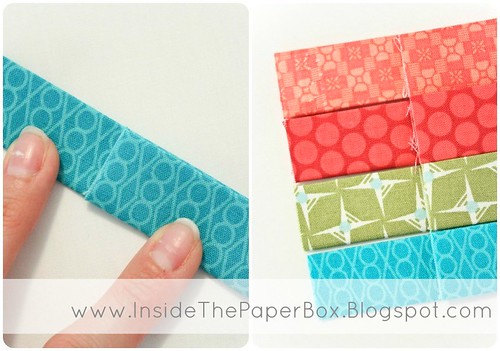
Another little bit of ironing, fold your strip lengthwise so that the top half of your strip is about 2" shorter that the bottom half and iron to crease.

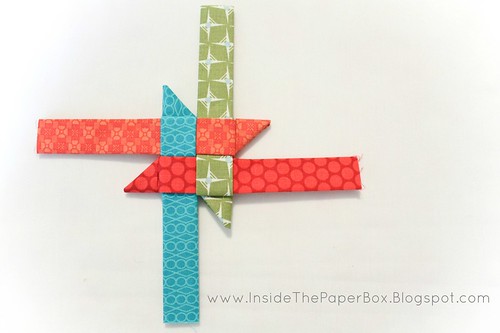
Let's weave our pieces together. With your short ends facing UP, overlap each piece one at a time as shown in the pictures above. For your last piece, overlap the previous piece you added, then slip both ends through your first strip as shown in the last picture above.
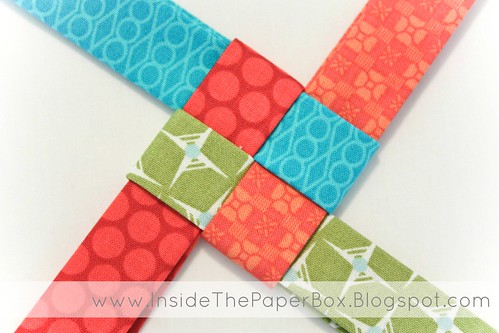
Wiggle, pull and tighten your fabric strips until your piece looks like the picture above.

Turn your piece over so the long ends are now on top. Starting in one corner, fold your strip over your piece (image 1). Move along to the next strip and fold over (image 2). Continue with the 3rd piece. On your fourth piece, pull it through the fold you created with your first strip fold (image 3).
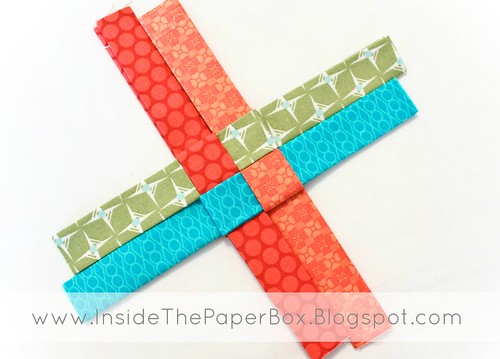
You should have a woven piece that looks like this with all your strip ends measuring approximately the same length.
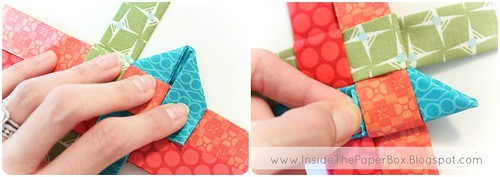
Making the points: Using one of your strips on the "top" of your piece (you should be able to determine this better when looking at your own piece) fold it to the back at an angle and back to the front at another angle (image 1 above). Fold your point in half to create your finished point. You now need to slide the end of your strip into the fold you created as shown above in picture 2. You will have a tiny bit of excess fabric peeking through in the center, don't worry, we'll fix that later.
Skip your "back" strip, and continue making points in the same way around the front of your star. You will create 4 points on this side, every other strip. (above) Turn your star over and do the exact same thing on that side. I had to loosen my strips a bit to pull pieces through other pieces, then I just tightened them all back up.
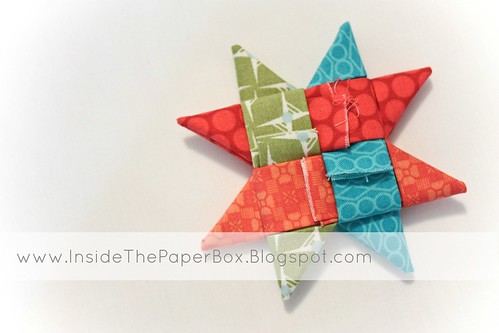
At this point I hope this is all making sense, ;) and, you should have an actual STAR! Yeah!
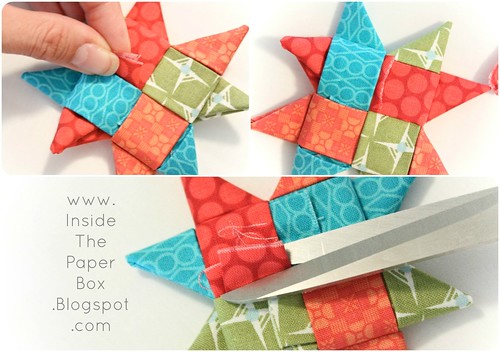
So let's trim up those ugly ends. Looking at pictures 1 & 2 above, I actually pulled each point further through GENTLY in order to trim the ends enough to hide inside my star. Be careful not to pull your point all the way out, just enough to trim it up. Then pull it back to resemble your point, being VERY CAREFUL again, not to pull it all the way out. Just wiggle it gently until it takes its shape back. Do this with all the ends that are showing in the center of your star.
I totally cranked the steam on my iron and ironed the heck out of my star once all my ends were trimmed. I just wanted a crisp, flat perfectly pointy star. :)
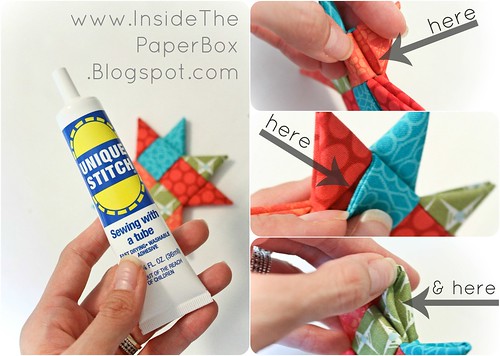
I'm pretty sure the tutorial I used stopped here, but I was kind of worried about my star falling apart after years of use, or that it would take about 3 seconds for my one year old to rip it to shreds. I decided to make mine a little more durable. I had this tube of liquid stitch, fabric glue and it worked perfectly. I put a small bead of glue in as many spaces as I could. Don't get crazy and squeeze glue all over so it's oozing out of every corner. Just dab a little wherever you think it will help to keep your star from coming apart.
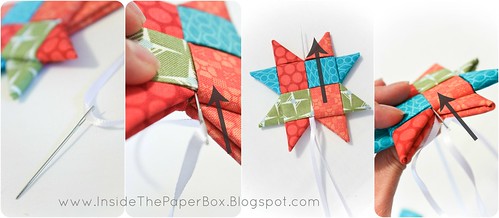
On the original tutorial, she used a nifty punch thing that chopped a hole through all layers of the folded fabric in order to hang your star. I didn't have that punch thing on hand, so I had to come up with another hanging method. I used 1/8" satin ribbon and a tapestry needle to thread it down through the top of the star, out the bottom, back up the other side and out the top where you started. You now have your two ends of ribbon coming out the top. You can finish it off from here however you like. I tied a knot, added a decorative bead, tied the ends together and trimmed them up even.
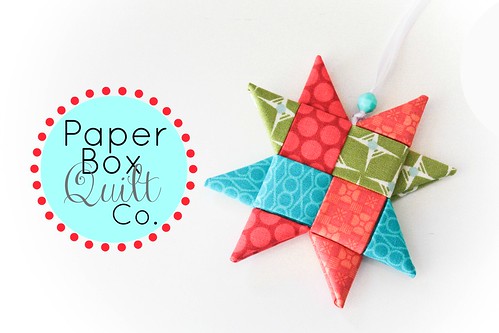
Now, you have this super cute, super easy, super inexpensive star ornament to hand out to all your friends and family this holiday! My brothers, their wives, me & Tom exchange surprise handmade ornaments so I was testing some for this year and this was one of my favorites. I plan to tie these to packages, hang some on my windows. Basically, just put them everywhere because, well, they're just adorable.
Please, please, PLEASE contact me with any questions you may have about putting this together. I'm not entirely sure all my steps are completely clear and since this is my first tutorial, it may just be all gibberish. Also, please link me up with your stars or tag me on Instagram (Insidethepaperbox) so I can see what you come up with.
See you soon! xoxo
