
Oh hi! So, I may have forgotten how to blog and this post might have taken me about a week to write. No really. (correction: original post took me a week, then it vanished into thin air so I'm on week 2, writing this post again. See. Forgot how to blog) ;)
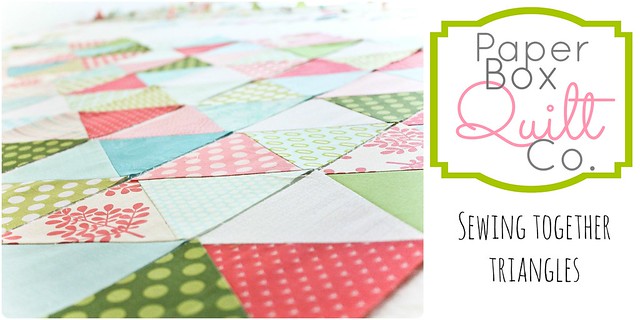
Things are always busy. That's just the way it is. I let my blog get away from me, BUT the good news is that I've done a lot of cool stuff lately, so I'll have plenty to share soon. First up is a little how-to for sewing together triangles. I've seen some really cute triangle quilts lately so I decided I needed to make one myself. I was so annoyed at how much trouble I was having sewing these together. I mean, I was sewing triangles, not parallelograms or trapezoids. Triangles. So I asked my stitchy friends on Instagram for a little help and I'm going to share what I discovered worked best for me. There's really no trick or shortcut to it, just patience.
Things are always busy. That's just the way it is. I let my blog get away from me, BUT the good news is that I've done a lot of cool stuff lately, so I'll have plenty to share soon. First up is a little how-to for sewing together triangles. I've seen some really cute triangle quilts lately so I decided I needed to make one myself. I was so annoyed at how much trouble I was having sewing these together. I mean, I was sewing triangles, not parallelograms or trapezoids. Triangles. So I asked my stitchy friends on Instagram for a little help and I'm going to share what I discovered worked best for me. There's really no trick or shortcut to it, just patience.
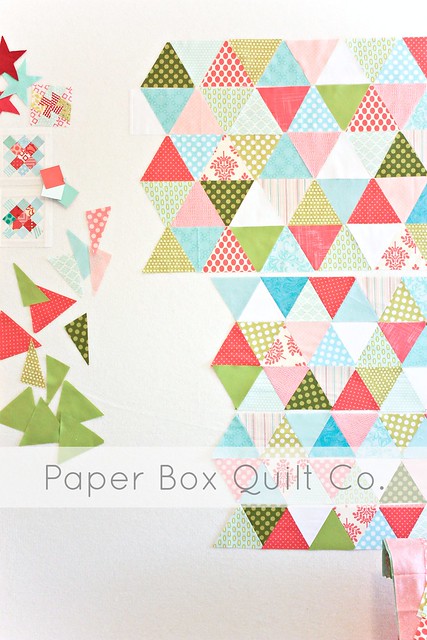
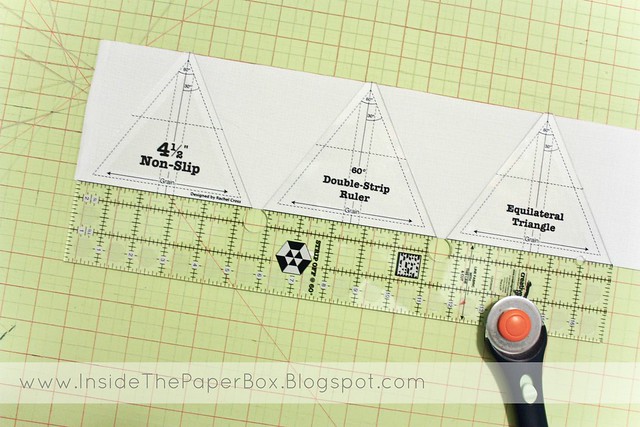
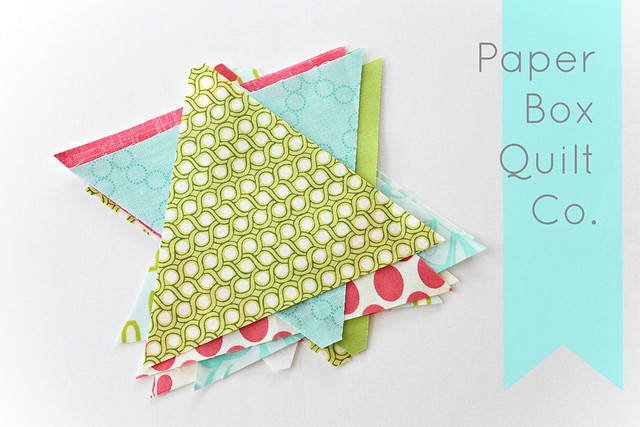
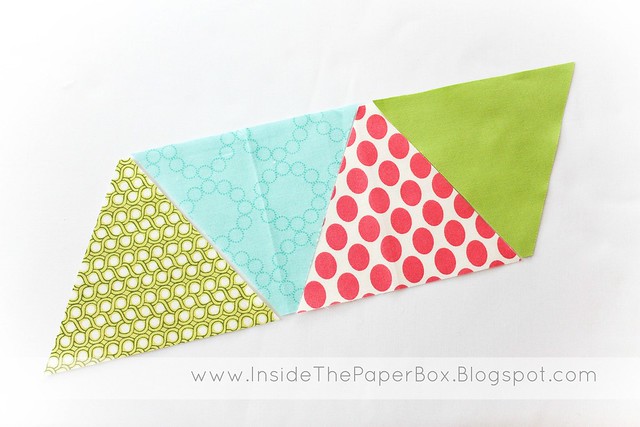
First things, first, I used the ruler below to cut my triangles. You get 4.5" equilateral triangles. I tried using the 60 degree lines on my straight cutting ruler, but this worked better for me and I found it at my local quilt shop. The directions say to cut 4.5" x WOF strips, then line up your fabric strips on the triangle portion of the ruler. You can cut 5 triangles at a time, more if you layer your fabric. If you're using this ruler, you'll get triangles with 2 sharp points and one flat point. That will be important when you're matching up your pieces. Once you have all of your triangles cut, lay them out just how you want to sew them together. For mine, I just went with a random layout.
Stack up your first row IN ORDER that you will be sewing it. I actually laid them out again right next to my machine just so there would be no placement issues while I was sewing.
Let's sew the first two triangles together. Stack them right sides together making sure to match your sharp points and flat points like below and sew them together using a 1/4" seam.
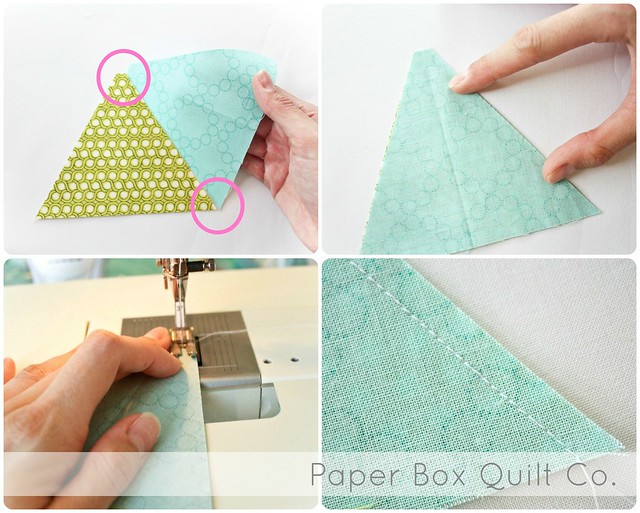
"Tip" #1: Press your seams OPEN AS YOU GO trying not to stretch those bias edges. You want to sew, press, sew, press, sew, press and so on. I'm a big fan of chain piecing then pressing like a million pieces at once (or recruiting my mom to press a million pieces for me) ;) "Tip" #2: Don't try to chain piece these. I started off chain piecing and it just didn't work. I also almost always press seams to the side, but for this, definitely press open! If you're a strict to-the-side presser, try doing these open, you'll find that you will get much nicer points and your pieces will be easier to match up. So, press seams open, don't chain piece.
Move on to your next triangle, sewing and pressing the same as the first set, making sure to line up your flat and sharp points and pressing your seams open again. Continue sewing all your triangles into rows.
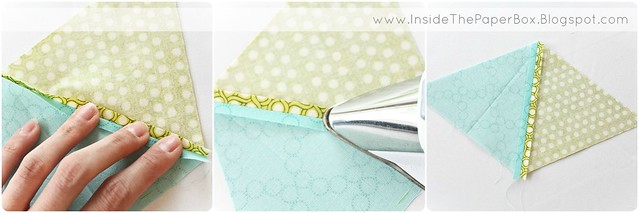
"Tip" #3: Trim your points. Once I had all my rows sewn together, I went through and trimmed the little points off from the "intersections". I thought it would help reduce bulk right where I wanted my fabric to lay flat and my points to be pointy. You can see three little points in the seam below, just chop those off. (but be careful not to chop into the seams of course)

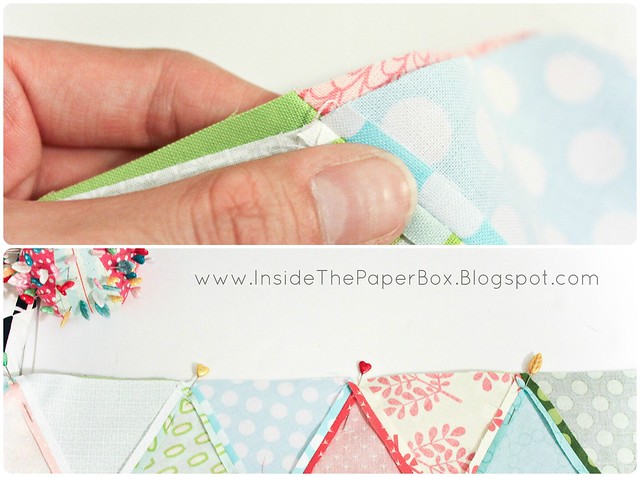
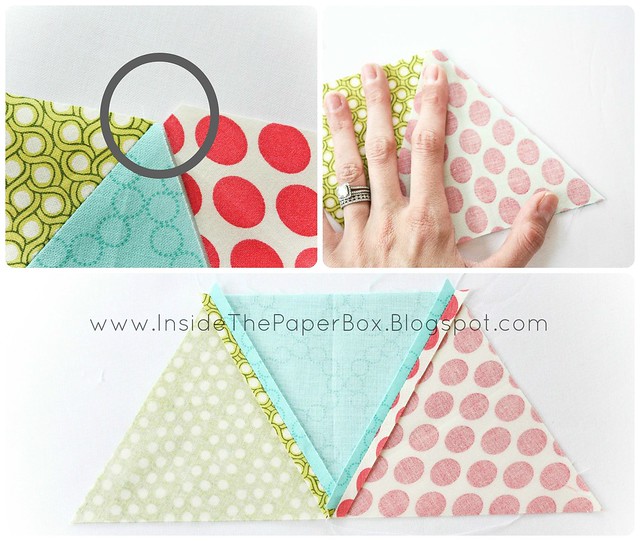
To sew your rows you just want to line up your seams/points really well. Here's "tip" #4: pin. pin. pin. I am so guilty of never pinning. Ever. Don't skip it here! These triangles really got me out of my comfort zone and had me pinning like crazy. Line up each point and put a pin right in your seams. For some of my points I was a bit OCD and spent a little extra time matching the points. If you take your pin and stick it through the tip of the point on the top and bottom layers, wiggle it together a little then pin it flat you'll have those points matching even if you didn't get a perfect 1/4" seam allowance at every point. (that's a lot of pinning points right? Let me know if it doesn't make any sense). Press seams open.

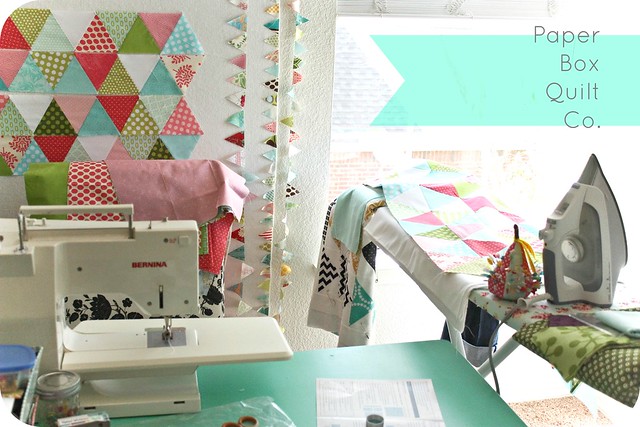
You can see above how sharp the points turned out and how nicely they matched up. Like I said, there's really no trick to this (as I discovered the hard way). You just have to be patient and don't try to find a shortcut. I took a picture of my sewing area so you could see that I pushed my ironing board as close to my machine as I could get it since I had to press after every piece. I'm so used to "batch" quilting that this was really strange. Aaaaand I might be a little bit lazy.
So, if you ever wanted to try piecing triangles, go for it! Be sure to post pictures or share them on Instagram and let me know how these tips worked for you! See you soon. (hopefully)
XOXO
thanks for the tips on this. i hope not having that ruler does not make this too much harder. i just cut everything for my first triangle quilt, and i am crossing my fingers for success
ReplyDeleteThanks so much for the tutorial! I've been admiring these quilts for quite a while, and now I know how to make them, thanks to you. And nice pictures by the way. Very easy to read and understand. I just discovered your blog and you on Instagram. Look forward to learning more from you.
ReplyDeleteJulia
oh yes - and I think we might have the exact same Bernina sewing machine. Nice to see another girl that has one like me, and not the fancy ones. Gives me hope I can still make beautiful quilts. (although I'd love to get the Bernina Aurora 440 QE)!!
ReplyDeleteThanks for the tutorial! I have just started quilting, but I haven't taken a class. I don't know if I make them right, but this tutorial was a big help. I'd love to see more tutorials!
ReplyDeleteNow I know why I should have paid more attention to my Plane Geometry class! Barely eked out a passing grade in it.
ReplyDelete